Showing posts with label DIY. Show all posts
Thursday, February 13, 2014
Bedroom Art
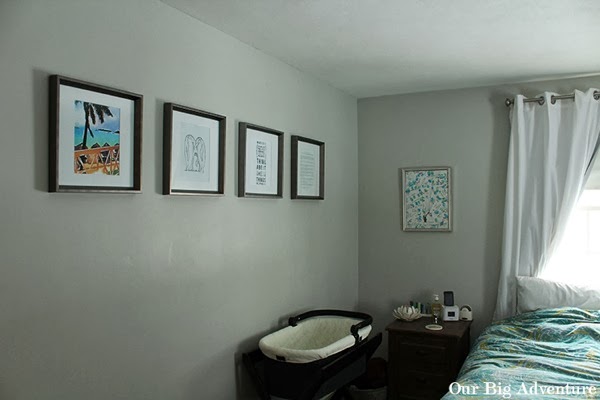
Check something else off the list! I finally have all the frames in our room filled. That only leaves the closet makeover before we can really call our room complete. I’m not convinced that the amount of color looks balanced or am I particularly sold with the height of the two pieces over our night stands or if they look quite right any advice please send it my way. But overall I’m pretty happy with everything.
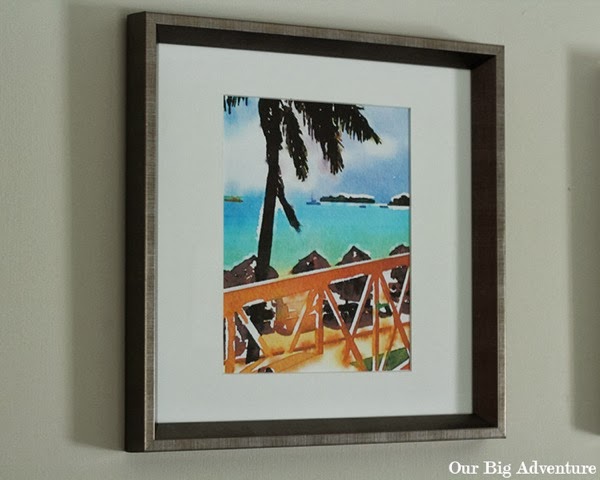
The frames are Threshhold from Target, no longer available, they originally had landscape 5x7 mats in them but I had more ideas for 8x10 portraits so I had new mats made at Michaels. The mats ended up negating the fact that I got the frames on clearance, oh well. From left to right the art is: a photo from our honeymoon edited in the Waterlogue app, Penguin Love, Whatever (painterly), Our Marriage Prayer (wedding gift).
All the art is special but my own homemade print is my favorite. This app is fairly new and a few of my favorite bloggers have featured it so, I coughed up the $3 and gave it a try. I love it. The quality is great, I printed this on my Canon photo printer on heavy weight card stock and it looks wonderful!
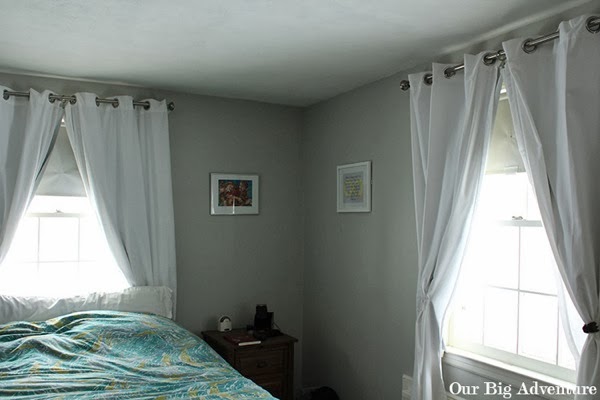
I also hung our wedding guestbook canvas, from Teardrop Weddings (doesn't look like they have an active website anymore), over my nightstand. Again I don’t know if it will stay but I felt like we needed some height over the nightstands and I didn’t want to do this, because we are clumsy and one of them would eventually be broken but maybe it would be nice to have some lamps. I also have a sneaking suspicion that in approximately nine (NINEHOLYMOLYNINE!!!) weeks it will be taken over by middle of the night baby supplies. Yes, the bassinet is already set up, someone in our house doesn’t cope well with change. That someone happens to weigh 102lbs and is very furry, the bassinet has been up since January to help him get used to it being there, in hopes that when there is a tiny human in it, it won’t be so intimidating.
On the other side of the bed over Bruce’s nightstand I hung art that we received for Christmas from the Canadian cousins, the colors are perfect for the room. Also over on that side is the anniversary art I made for Bruce in May. Again issues with hanging height. But perfect in our room!
Tuesday, February 4, 2014
Basement Adventures: Drylock
This part of Phase two is the beastliest! But I'm happy to say that after seriously hard work for two weeks by Bruce and my parents it is finally done!
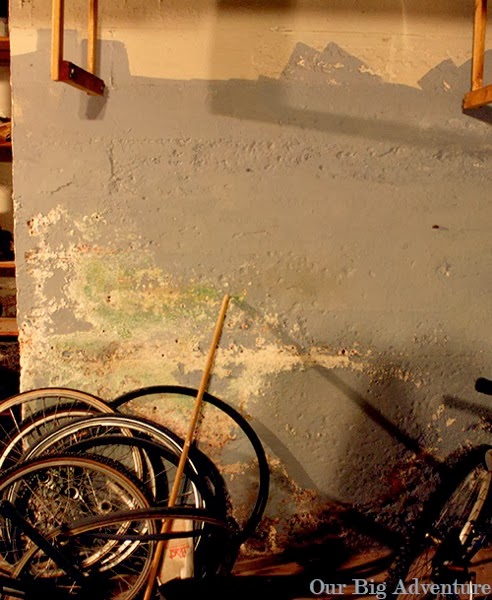
When we moved in our basement was a mess, not only was it full of (mostly) crap, but there were also water issues. During the summer of 2010 I solved the major water issue by filling the holes in the window casings with some Drylok Fast Plug Cement and by cleaning the gutters and adjusting the downspouts. We have a crack near the dryer under one of the windows that will require Fast Plug before painting, we only get a small puddle there when it rains very hard. But the basement was still damp, like damp, cardboard gets soggy damp. Then I saw this post over at YHL. Problem solved, kind of. You see our nasty walls already had several coats of some type of paint on them, which, was in several stages of peeling off. When the paint peels off you get this wonderful stuff called efforescence, which are salts carried through the concrete with the water. For a long time Bruce thought this was mold, granted, there was plenty of mold growing damp cardboard but it wasn't actually growing on the walls!Originally I thought it would be simple, slap some paint on the walls and floor and call it a day. Then I read the UGL Drylok packaging. "If you have existing paint or efflorescence use UGL etch to prepare the surface for painting. Then I read the etch directions ensure that surface is free of dust, dirt and any oils. Now it's a process. First we scraped the walls with wire brushes, trying to get any and all loose paint and concrete away off the walls.
Second we cleaned the walls using a mild all purpose soap, we used Mrs. Myers and Lysol, following up by spraying down the walls with water using a pesticide sprayer to make sure we got all the soap off. Using the sprayer also helped get loose sand and grit out of the nooks and crannies of the walls. Bruce and my dad may have found this tedious and just hooked up a hose to the pressure tank on the pump, which, also worked.
Now wet vac up the soapy water and set up some fans, a dehumidifier and crank up the wood stove (if you have one) and wait until everything is dry. Is it dry? Good, now slather on the acid etch, wear a respirator that stuff reaks! Wait 30 minutes. Now rinse off the etch and get the walls nice and dry again.
Now you can paint, but you can't just roll this stuff on because you cleaned out all those nooks and crannies so buy some cheap paint brushes so you can get the paint nicely into all the nooks and crannies. You'll need two coats to cover the four different colors of paint and bare concrete that are your basement walls. We found that going over everything with a roller helped create a uniform finish.
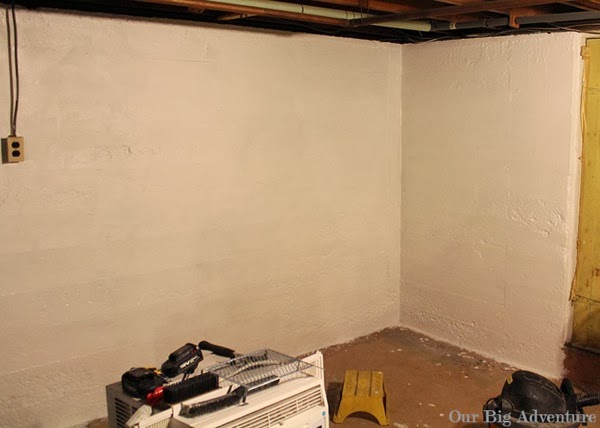
Admire your hard work.
Repeat for the floors. Admire some more.
We are using UGL latex Drylok on the walls, as of now we have used a total of seven gallons. We're using latex instead of oil because we couldn't be sure what type of paint was already there. On the floors we are using Behr's Garage Floor Epoxy, it does scratch when you're moving large items like book cases so be aware of that, our goal for the floors was to have a uniform color and something that will prevent water from coming up and this, so far, is working pretty good. Also when painting the walls we came down onto the floors about four or five inches out from the wall then went over it with the floor paint, for extra waterproofing around the walls. Now everything looks so fresh and clean, its great motivation to get our work spaces set up so we can get moving on the fun projects to get ready for baby! I can't thank my parents enough for all their help with this HUGE project the only step I could help with was the wall washing and it would have taken Bruce at least twice as long to finish without their help!!!
Monday, January 27, 2014
Basement Adventures: Planning
It's just one line item on our Big Adventurous List but waterproofing the basement is a huge task with what was a huge post, but I’ve decided to break it down into a few posts. What make this task even more cumbersome right now is that I can't help with much of it AND getting the basement under control is step one in the cascade of events to pull together the nursery before April.
This is the layout of things as they are now(the built in shelving under the stairs is still there somehow the labels got lost!), the wall with the storage shelving on it and the floor from that wall to the bottom of the stairs have already been painted. Those will not move during Phase Two. The other storage shelving was all existing, we kept the best of it and moved everything to the middle of the space to paint/waterproof the walls and the perimeter of the floor. Not included in this layout is furniture that will be part of the Phase two re-arrangement but it has all been moved around for painting.
This is how we will hopefully have things arranged at the completion of Phase Two. It will give Bruce a nice open space for his workshop, his many, many tools aren’t on the layout but the will most likely line the short wall. Our wood stove has been a workhorse this winter and running it cuts our oil bill way down but so far we can’t really enjoy it the way we’d like to. But once the majority of the waterproofing is done it will feel safe to bring the old club chairs down from the attic for some comfy seating and Bruce will set up his desktop on the vintage metal desk that has always been down there. The purple box around the washer and dryer area will be the only area un-waterproofed, setting up a finished laundry area will be Phase Three.
This is the basic layout of things that we can’t move, or at least can’t move with out a lot of trouble. I didn’t include the support columns but they run down the middle of the space the long way, there are a few doubles right in the middle of the house near the furnace. Phase One of the Basement Adventure was the massive cleaning we did after we moved in.
This is the layout of things as they are now(the built in shelving under the stairs is still there somehow the labels got lost!), the wall with the storage shelving on it and the floor from that wall to the bottom of the stairs have already been painted. Those will not move during Phase Two. The other storage shelving was all existing, we kept the best of it and moved everything to the middle of the space to paint/waterproof the walls and the perimeter of the floor. Not included in this layout is furniture that will be part of the Phase two re-arrangement but it has all been moved around for painting.
This is how we will hopefully have things arranged at the completion of Phase Two. It will give Bruce a nice open space for his workshop, his many, many tools aren’t on the layout but the will most likely line the short wall. Our wood stove has been a workhorse this winter and running it cuts our oil bill way down but so far we can’t really enjoy it the way we’d like to. But once the majority of the waterproofing is done it will feel safe to bring the old club chairs down from the attic for some comfy seating and Bruce will set up his desktop on the vintage metal desk that has always been down there. The purple box around the washer and dryer area will be the only area un-waterproofed, setting up a finished laundry area will be Phase Three.
Tuesday, September 24, 2013
Adventures in Roofing
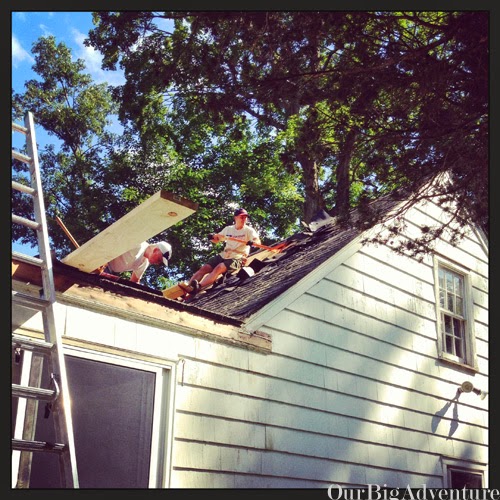
July first we started our Big Roofing Adventure, it also was the start of a huge heat wave, perfect for roofing. The dumpster was delivered, oh so exciting. But the first thing that went into it was not roof related, it was our big broken recliner couch! (More on that in another post).

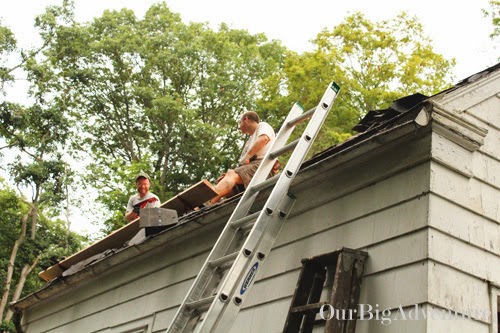
July third we spent three hours at Home Depot, then got up the morning of the fourth sometime entirely too early. Bruce's parents arrived and work began, Bruce's parents were present for 95% of this roofing adventure and their help was invaluable. Looking back now the days seem to run together, but I know that we collapsed after dinner.

Many of the joists on the back of the breezeway needed to be reeinforced and all the plywood needed to be replaced. We knew that we would need to replace the plywood but not the joists. We didn't even have the right size boards so Bruce and his dad had to rip 2x8's down to 2x6 which added significantly to our timeline.


Our friend Jon came down on Saturday and Sunday of 4th of July weekend and his help was also invaluable. And even I (not a big fan of heights or a person who functions well in the heat) got up on the roof to assist laying the flat roof. Kenny was the spotter while we were all on the roof.


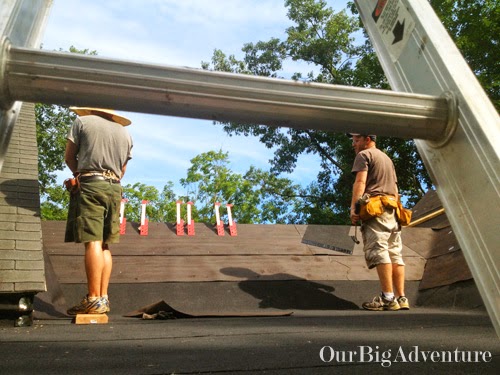
By the end of the day Sunday all the roofing felt was down (making the roof water proof) some of the front was done and the flat roof was done (the hardest part.)

Have I mentioned yet that it was 102 degrees while they/we were up on the roof. It was so hot that the special tar for the flat roof wouldn't set and it was sliding under our feet as we were trying to lay it. You might notice in some of the photos that Bruce is wearing a big straw hat, i bought that while we were in Jamaica on our honeymoon. I also implemented frequent water/gatorade breaks and kept frozen wash cloths in the freezer that we rotated into the cooler and luckily no one had heat stroke. There was also a lot of 50 spf.

We both took Monday off. I would love to say that we spent quality time together but I can't. We went back and forth about calling someone to finish the job it was unpleasant but we worked through it and were fine by bedtime. Bruce called for an estimate but after looking at the few rows of finished front shingles for the rest of the week we made some command decisions. We returned the original 3 tab shingles and got architectural shingles, they look no different once they are on but they are much easier when there is a lot of cutting involved and our roof has a lot of cutting involved. Then into the dumpster went the first few rows on the front, replaced with the new kind of shingles. Then we (and by we I mean Bruce) decided to do both sides of the garage. Initially we were only going to do the side of the garage that meets the breezeway, but we decided that we had enough materials and still had the dumpster so we should just go for it. So Jon came back and helped to strip and felt the far side of the garage. We emptied a few more things out of the dumpster and called the company to come take it away. The dumpster was hauled away on Monday July 22.

Like I said before the timeline is a little hazy Bruce's parents came back the first weekend of August (I think Sunday) and they got all the shingles laid on the far side of the garage. The rest of the shingles Bruce did after work. The breezeway peak is done and vented, so all that is left is to finish the garage peak.

Now to finish the inside. :-)
July third we spent three hours at Home Depot, then got up the morning of the fourth sometime entirely too early. Bruce's parents arrived and work began, Bruce's parents were present for 95% of this roofing adventure and their help was invaluable. Looking back now the days seem to run together, but I know that we collapsed after dinner.
Many of the joists on the back of the breezeway needed to be reeinforced and all the plywood needed to be replaced. We knew that we would need to replace the plywood but not the joists. We didn't even have the right size boards so Bruce and his dad had to rip 2x8's down to 2x6 which added significantly to our timeline.
Our friend Jon came down on Saturday and Sunday of 4th of July weekend and his help was also invaluable. And even I (not a big fan of heights or a person who functions well in the heat) got up on the roof to assist laying the flat roof. Kenny was the spotter while we were all on the roof.
By the end of the day Sunday all the roofing felt was down (making the roof water proof) some of the front was done and the flat roof was done (the hardest part.)
Have I mentioned yet that it was 102 degrees while they/we were up on the roof. It was so hot that the special tar for the flat roof wouldn't set and it was sliding under our feet as we were trying to lay it. You might notice in some of the photos that Bruce is wearing a big straw hat, i bought that while we were in Jamaica on our honeymoon. I also implemented frequent water/gatorade breaks and kept frozen wash cloths in the freezer that we rotated into the cooler and luckily no one had heat stroke. There was also a lot of 50 spf.
We both took Monday off. I would love to say that we spent quality time together but I can't. We went back and forth about calling someone to finish the job it was unpleasant but we worked through it and were fine by bedtime. Bruce called for an estimate but after looking at the few rows of finished front shingles for the rest of the week we made some command decisions. We returned the original 3 tab shingles and got architectural shingles, they look no different once they are on but they are much easier when there is a lot of cutting involved and our roof has a lot of cutting involved. Then into the dumpster went the first few rows on the front, replaced with the new kind of shingles. Then we (and by we I mean Bruce) decided to do both sides of the garage. Initially we were only going to do the side of the garage that meets the breezeway, but we decided that we had enough materials and still had the dumpster so we should just go for it. So Jon came back and helped to strip and felt the far side of the garage. We emptied a few more things out of the dumpster and called the company to come take it away. The dumpster was hauled away on Monday July 22.
Like I said before the timeline is a little hazy Bruce's parents came back the first weekend of August (I think Sunday) and they got all the shingles laid on the far side of the garage. The rest of the shingles Bruce did after work. The breezeway peak is done and vented, so all that is left is to finish the garage peak.
Now to finish the inside. :-)
Wednesday, May 8, 2013
Monogram Doormat
We have had a gross piece of the leftover black rubber welcome mat for almost two years. It's embarrassing, now, the Christmas Tree Shoppe has monogram doormats but I could never seem to find the right one.
I decided to make one, so I pinterest-ed around I after pinning a few things I think this is the source. Pinned here and here. Then I got too it.
I bought the mat for $10 at Home Depot, but I'm sure you could find one for less at Wal-Mart, I was at HD that day so that's where I bought it. I used my Silhouette machine to make the monogram.
I used painters tape to roughly make a one inch border and some newspaper to cover the negative space. Now even though I used adhesive card stock for the monogram I ended up needed to use some pins to keep it from curling and I should have used more (there was a little over-spray).
Then I sprayed away, I used spray paint for plastic but that was just what I had, I'm sure regular spray paint would work fine.
It looks so much nicer, like, maybe grown-ups live here. It's been out for a few weeks and still looks great, probably better as the little bit of dirt hides the overspray!
I'm linking this to some Pinterest Parties at Young House Love, Bower Power, Sparkle Meets Pop and RedBirdBlue.
I decided to make one, so I pinterest-ed around I after pinning a few things I think this is the source. Pinned here and here. Then I got too it.
I bought the mat for $10 at Home Depot, but I'm sure you could find one for less at Wal-Mart, I was at HD that day so that's where I bought it. I used my Silhouette machine to make the monogram.
I used painters tape to roughly make a one inch border and some newspaper to cover the negative space. Now even though I used adhesive card stock for the monogram I ended up needed to use some pins to keep it from curling and I should have used more (there was a little over-spray).
Then I sprayed away, I used spray paint for plastic but that was just what I had, I'm sure regular spray paint would work fine.
It looks so much nicer, like, maybe grown-ups live here. It's been out for a few weeks and still looks great, probably better as the little bit of dirt hides the overspray!
I'm linking this to some Pinterest Parties at Young House Love, Bower Power, Sparkle Meets Pop and RedBirdBlue.
Friday, January 18, 2013
What if AWAY doesn't exist?
Our kitchen has a weird layout, which makes it a weird space complete with a weird, door-filled hallway.
Now, one might think there is plenty of cabinet space and for your average domestic goddess it might be. But not for one that has a love for kitchen gadgets. Avocado slicer, got it. Corn stripper (here we are referring to a small device that removes cooked corn from the cob not dancers in the Mid-West), got it. Every attachment for a Kitchen-Aid stand mixer, not quite but I'm pretty damn close. You get my point, lots of kitchen stuff and things weren't always getting AWAY because AWAY didn't exist or was to hard to get to. This is compounded by the size of our cabinets, the shelves aren't adjustable and they aren't deep enough. Something had to give. So we started a pantry downstairs, which helped get every attachment known to the cooking gods (but the grain mill) into the cabinets and off the dining room floor. But then the newly acquired ceramic non-stick weren't playing nice in the pot cabinet and one didn't fit at all. So I started hanging it over the pizza peel which as you can see is on our weird hallway to the office.
Then we got a massive carving board for Christmas which need a home also. I decided that weird hallway wall was a great place to hang them.
Bruuuuuuuuuuce can we hang more stuff on the wall?
Yea babe just tell me where to hang them.
Fast forward eight weeks. While making dinner this week I was planning. First I tried to eyeball it. No dice. So ala YHL I cut the shapes out of paper and stuck them on the wall until I found an arrangement I liked, then said ok put the hooks there.
And he did. Now the ceramic non-stick plays nice, beautiful wood looks beautiful. Most importantly we used dead wall space and things are AWAY.
Monday, October 24, 2011
Fall Garland
I saw somewhere on pinterest a fall garland of gourds and twine. I had a few coupons to Michael's so I used them to pick up some fake gourds and hemp.
The hemp was not as thick as I wanted it to be so I decided to braid it. I unrolled a lot, then draped it across the mantle. Once I was happy with the length I cut three of them. I tied a knot in one end and put a large safety pin through it and used the safety pin to hold it to the couch.
Then I braided. I hate this couch. We need new furniture.
Once I was finished braiding I used scotch tape to hold the ends together. This not only served to hold it all together but it also gave it some strength which I would need to thread the gourds onto the twine.
I used a drill bit which I thought would be the same thickness of the twine and drilled holes through all the gourds, not all the same or right through the middle. I strung them onto the twine using a knot on either side to keep them in place.
This currently is the only fall decoration we have up. There's a whole box in the basement of decorations just haven't gotten to it yet.
Friday, February 25, 2011
Slipping Duvet
Don't you just hate it when your duvet slides around inside the beautiful, new duvet cover? I decided to do something about it.
Iron-On Velcro
Step 1: Cut matching hook and loop pieces for the corners and middle.Step 2: Take the duvet out of the cover and turn the cover inside out.
Step 3: Iron on the velcro, shake the duvet to move the batting out of the area. Iron the back side on the highest setting with the velcro against the ironing board. Use another piece of iron-safe material to protect your duvet and cover.
I used a rag that used to be one of Bruce's t-shirts.
Tip: Iron the velcro onto the same corners. Or it will look all bunchy. I'll get around to fixing it this weekend.
Friday, February 11, 2011
Last Minute Decorations
I picked up a few things at Joanne Fabric in the 40% off section.
The red and white candles were left over from Christmas, I love it when I can stretch decorations to last multiple holidays!
I also cut small sections and placed the silver hearts on the ends. I placed them in a little vase like flowers.
This wasn't everything; the florist's wire and pliers are mine.
I needed something for the gaint vase that was festive. I took the heart wire and attached some of the silver hearts with the florist's wire.
The red and white candles were left over from Christmas, I love it when I can stretch decorations to last multiple holidays!
I also cut small sections and placed the silver hearts on the ends. I placed them in a little vase like flowers.
This took less than an hour and looks so cute!
Tuesday, February 8, 2011
How to Make a Dog Bed
I started this project last winter, I thought it would be easy to just sew up the edges of one of Kenny's blanket throw in a zipper.
I started with the blanket, a "for sports wear" zipper, "heavy duty" thread, and a foam mattress pad.
I then cut the seamed edges off the blanket. Which turned out to be a big mistake because the sewing machine kept getting caught on the cheap fleecy blanket, I think that this wouldn't have happened on the seam.
I turned it inside out and pinned the edges. Placing the zipper in one of the short ends. Kenny wanted to know what I was doing to his blanket. Look how little he was!!!
Sorry for the crappy photo I was just glad to be done.
I ended up hand sewing the entire thing.
I was so determined to finish this project that I forgot I was attempting to get the Boston Red Sox B on the top and the long seam on the bottom.
All I did after this was to double over the foam and cut it to size.
Kenny loves it, he sleeps on it every night next to our bed.
Sunday, December 5, 2010
Painting Adventure: Making Progress
So on the 18th of November, our room was such a disaster with the re-paint that we started sleeping in the guest room. And we've been sleeping in the guest room. With half the furniture from our bedroom, and the ironing board and (of course) Kenny puppy. Now because I didn't take our bed out of the room I trailed the paint around the perimeter of the room with me and it has taken me this long to get all the paint off the floor and piled everything on the bed which means all our bedding is due to be washed.
We're almost there. We will sleep in our own room tonight.
I have to go make the bed.
oh yea, Benjamin Moore - Grey Owl on the walls and the trim is White Blush (also BM both Natura)
There's obviously a lot still to do, curtains, furniture, paint the rad cover, replace outlets and switches . . . but it will be great to sleep in our own bed again.
We're almost there. We will sleep in our own room tonight.
I have to go make the bed.
oh yea, Benjamin Moore - Grey Owl on the walls and the trim is White Blush (also BM both Natura)
There's obviously a lot still to do, curtains, furniture, paint the rad cover, replace outlets and switches . . . but it will be great to sleep in our own bed again.
Monday, November 22, 2010
Painting Aventure: Progress
I'm making progress in our bedroom, but not as quickly as I had hoped.
Problem 1: Two different types of ceiling paint and trying to make the open can last. First was that I left some holidays trying to stretch the open can, then I had to go back and touch up with the different paint. EPIC FAIL. Which I am ignoring for now.
Problem 2: The glazing putty on the window panes is dry and cracking off, this leads to condensation which leads to mildew that had to be scrubbed off before the windows could be primed.
Problem 3: Distraction! Tim came over to help with the tree, minus at least 1 hour catching up.
Problem 4: Painting until 10pm = Bruce making mac & cheese after getting home from class and we sleep in the guest room.
Ready-To-Go for the actual paint!
Problem 1: Two different types of ceiling paint and trying to make the open can last. First was that I left some holidays trying to stretch the open can, then I had to go back and touch up with the different paint. EPIC FAIL. Which I am ignoring for now.
Problem 2: The glazing putty on the window panes is dry and cracking off, this leads to condensation which leads to mildew that had to be scrubbed off before the windows could be primed.
Problem 3: Distraction! Tim came over to help with the tree, minus at least 1 hour catching up.
Problem 4: Painting until 10pm = Bruce making mac & cheese after getting home from class and we sleep in the guest room.
Ready-To-Go for the actual paint!
Tuesday, November 9, 2010
Getting Ready: Worms!
Before the giant tree came down in our backyard, I was really disappointed about the FAIL that our garden got. But now that the light blocker is gone the garden will stay and it is definitely going to need some compost to get it going in the spring. I've decided to try vermiculture, composting with worms, in bins, in the basement. Pretty much everyone I've told thinks it will smell, I'm pretty sure it won't. I took a class at UMass Amherst with John Gerber, and many people were composting in their dorm rooms or apartments with worms, with no smell. We shall see. I'm following some build-your-own instructions I found here. However, I couldn't find the right size bins that weren't clear. So I grabbed some for-plastic spray paint and went to work.
I've ordered the worms, based on the research I did, this seems like the best option. And I've been collecting food for them for about ten days so that there would be good, squishy food when they get here.
I'm using the glass jar to collect kitchen scraps, the plastic bin will live in the basement as a receptacle when the kitchen jar is full. The plastic bottle is a fruit fly trap, just in case and it will live in the basement with the worms!
Side note: the for-plastic spray paint was awesome, I'm thinking of customizing our decoration storage boxes with corresponding holiday colors. Someday.
Subscribe to:
Posts (Atom)