
Thursday, December 23, 2010
Ooops!!!
I thought I was doing so good . . . putting together a few posts on Sunday night and scheduling them to auto-post through out the week. You know . . . because I have a JOB now, generally every morning starts with "this is stooooopid" don't get me wrong I really like my job and not playing musical credit cards at the grocery store is even better but actually having to work is a drag. And things happen like scheduling blog posts and not actually pushing the post button. Sorry about that and the dump of posts that are a week late!
Tuesday, December 14, 2010
Christmas Tree
What's the best thing to do on a pouring Sunday afternoon? Go cut down your own Christmas Tree. I transformed the house into a mess. Trying to get some of the decorations up and rearrange the furniture to incorporate the tree.

So after getting most of the candle lights in the windows and keeping the tree in the breezeway for a few hours to dry off, we put up the tree.

Then decorated it, I was worried that we wouldn't have enough ornaments but we definitely did.

So the tree is a little bit scraggly, but it makes me warm and fuzzy to know that we bought this tree from our neighbors. The tree farm was on one of Bruce's marathon train routes this is the definition of "Buy Local" and we love it!
Monday, December 13, 2010
Thursday, December 9, 2010
Thesis Update
Earlier this week I dropped of my thesis manuscript to be bound and entered into the University's library.
 Thesis 100%
Done.
Hopefully our work will be published in a journal this year or the coming year.

Done.
Hopefully our work will be published in a journal this year or the coming year.
Wednesday, December 8, 2010
A Week of Dinners
What's the most diverse protein?
Chicken.
What's the easiest thing to pop in the oven and do a bunch of other things?
Chicken.
What goes on sale once a month?
Chicken.
You get what I'msaying typing. It's also a great Sunday dinner. My new favorite way to roast a whole chicken was from Big Girls Small Kitchen which I can't directly link to because I can't find it. But you do this.
 No roasting rack, herbs, onion and lemon inside; salt and pepper on the outside (and maybe some bacon) and a big baking dish of potatoes underneath. Roast until the juices run clear (165 degrees).
Use for salads, calzones, stir frys, pot pies, enchiladas, gumbo, soup . . . pretty much anything you can dream up! AND you can make stock from it!
Chicken.
What's the easiest thing to pop in the oven and do a bunch of other things?
Chicken.
What goes on sale once a month?
Chicken.
You get what I'm

Use for salads, calzones, stir frys, pot pies, enchiladas, gumbo, soup . . . pretty much anything you can dream up! AND you can make stock from it!
Tuesday, December 7, 2010
Waterproofing: Update
Over the summer we started trying to make our basement dryer here and here. Then we got distracted by a tree. We figured out that the puddles in the stairwell were because the tension hinges were not in the doors, easy fix. And we haven't had any puddles since I sealed the windows. I think it's pretty awesome that we went from giant puddles to no puddles, just from sealing a two windows. I still need to put some DryLOK plug in a crack by one of the windows and eventually we'd like to DryLOK all the walls but the major water problem has been solved!
Monday, December 6, 2010
Quick and Easy Dinner
So now that I'm working a regular nine to five, quick and easy dinners are crucial. One of our favorites is pizza.

That baby is home made, all the way. The dough is super easy to make (or pick up on the way home).

That baby is home made, all the way. The dough is super easy to make (or pick up on the way home).
- 1 Teaspoon dry activated yeast
- 2/3 C warm water
- 2 C flour
- honey, sugar OR agave nectar
- salt
- olive oil
- Combine the yeast, warm water and a short squeeze (1 tsp~ish) of your sugar source. Let sit for five minutes, the yeast should wake up, start to smell yeasty and make some bubbles.
- Add 1.5C of the flour, plus some salt and four second drizzle of olive oil with the dough hook of your mixer.
- Gradually add the rest of the flour once the dough has formed a ball stop adding flour, beat at 6 or 8 for 5 minutes until the dough ball looks elastic.
- Turn dough out into an oiled bowl, cover with a dish towel and let rise for ninty minutes.
- Knock down and shape. (I usually make two regular size pizza from this amount of dough you would separate at this step, or if you are freezing or sticking the dough in the fridge for a few days do it after this step before the second rise.)
- Let rise for 1 hour on a floured surface.
Sunday, December 5, 2010
Painting Adventure: Making Progress
So on the 18th of November, our room was such a disaster with the re-paint that we started sleeping in the guest room. And we've been sleeping in the guest room. With half the furniture from our bedroom, and the ironing board and (of course) Kenny puppy. Now because I didn't take our bed out of the room I trailed the paint around the perimeter of the room with me and it has taken me this long to get all the paint off the floor and piled everything on the bed which means all our bedding is due to be washed.
 We're almost there. We will sleep in our own room tonight.
I have to go make the bed.
oh yea, Benjamin Moore - Grey Owl on the walls and the trim is White Blush (also BM both Natura)
There's obviously a lot still to do, curtains, furniture, paint the rad cover, replace outlets and switches . . . but it will be great to sleep in our own bed again.

I have to go make the bed.
oh yea, Benjamin Moore - Grey Owl on the walls and the trim is White Blush (also BM both Natura)
There's obviously a lot still to do, curtains, furniture, paint the rad cover, replace outlets and switches . . . but it will be great to sleep in our own bed again.
Sunday, November 28, 2010
So Thankfull
So we've been home for two hours, I'm huddled under a blanket in front of the fire, I can't feel my fingers or my nose. We turned the heat way down while we were gone this weekend. But I am thankfull that there is a fire in the fireplace and oil in the furnace. We had a great (hetic five days) and I am thankful that I have a new job to fund some presents for the upcoming holiday which counts the day after Thanksgiving as a holiday. We are thankful for our friends and family who welcome the three of us with open arms. I hope everyone's holiday weekend was as blessed as our was!
The new job is cramping my at home projects and reporting them to you, I'm sure as I get settled at work I'll be doing more around the house!
The new job is cramping my at home projects and reporting them to you, I'm sure as I get settled at work I'll be doing more around the house!
Tuesday, November 23, 2010
Leftover Solution
Remember the cupcakes I made for Halloween? Well I only used about half the container of cream and I hate to waste food. I saw Ina make this caramel sauce as I was flipping around one afternoon between her and Sarah's House (who I love) and it looked easy enough.


I followed this recipe which incidentally I had the exact amount of cream needed! I'm pretty sure I let the sugar get a little to dark before adding the cream. The only thing Ina forgets to mention in this recipe is to use a pot twice as big as you think you will need. This baby bubbles violently!
This was a jar that I found in the house and purchased the rubber ring for, but you can just as easily use tupperware. This will keep in the fridge for months, or give it to someone!
Monday, November 22, 2010
Painting Aventure: Progress
I'm making progress in our bedroom, but not as quickly as I had hoped.
Problem 1: Two different types of ceiling paint and trying to make the open can last. First was that I left some holidays trying to stretch the open can, then I had to go back and touch up with the different paint. EPIC FAIL. Which I am ignoring for now.
Problem 2: The glazing putty on the window panes is dry and cracking off, this leads to condensation which leads to mildew that had to be scrubbed off before the windows could be primed.
Problem 3: Distraction! Tim came over to help with the tree, minus at least 1 hour catching up.
Problem 4: Painting until 10pm = Bruce making mac & cheese after getting home from class and we sleep in the guest room.
 Ready-To-Go for the actual paint!
Problem 1: Two different types of ceiling paint and trying to make the open can last. First was that I left some holidays trying to stretch the open can, then I had to go back and touch up with the different paint. EPIC FAIL. Which I am ignoring for now.
Problem 2: The glazing putty on the window panes is dry and cracking off, this leads to condensation which leads to mildew that had to be scrubbed off before the windows could be primed.
Problem 3: Distraction! Tim came over to help with the tree, minus at least 1 hour catching up.
Problem 4: Painting until 10pm = Bruce making mac & cheese after getting home from class and we sleep in the guest room.

Friday, November 12, 2010
It Has Begun
Before I start working next week, I'm determined to get our bedroom painted. Currently the walls are . . . dirty.

We get great natural light, eventually I think that these curtains will go in the guest room, but it's pretty essential to have these thermal curtains on the windows.

I'll start with the ceiling and the walls. Then replace this dresser, with the yellow one in the next photo.

I'll replace the yellow dresser and the plastic drawers with a low long dresser and a mirror, the plastic hamper doesn't live in our room, it's a leftover from folding the laundry.

Stay Tuned.
Thursday, November 11, 2010
It's Very Important
To be prepared for hibernation.
 Fuzzy Slippers - Check
Cheerful Socks - Check
Leggings to fit under Boots - Check

Cheerful Socks - Check
Leggings to fit under Boots - Check
Wednesday, November 10, 2010
Un-Halloween
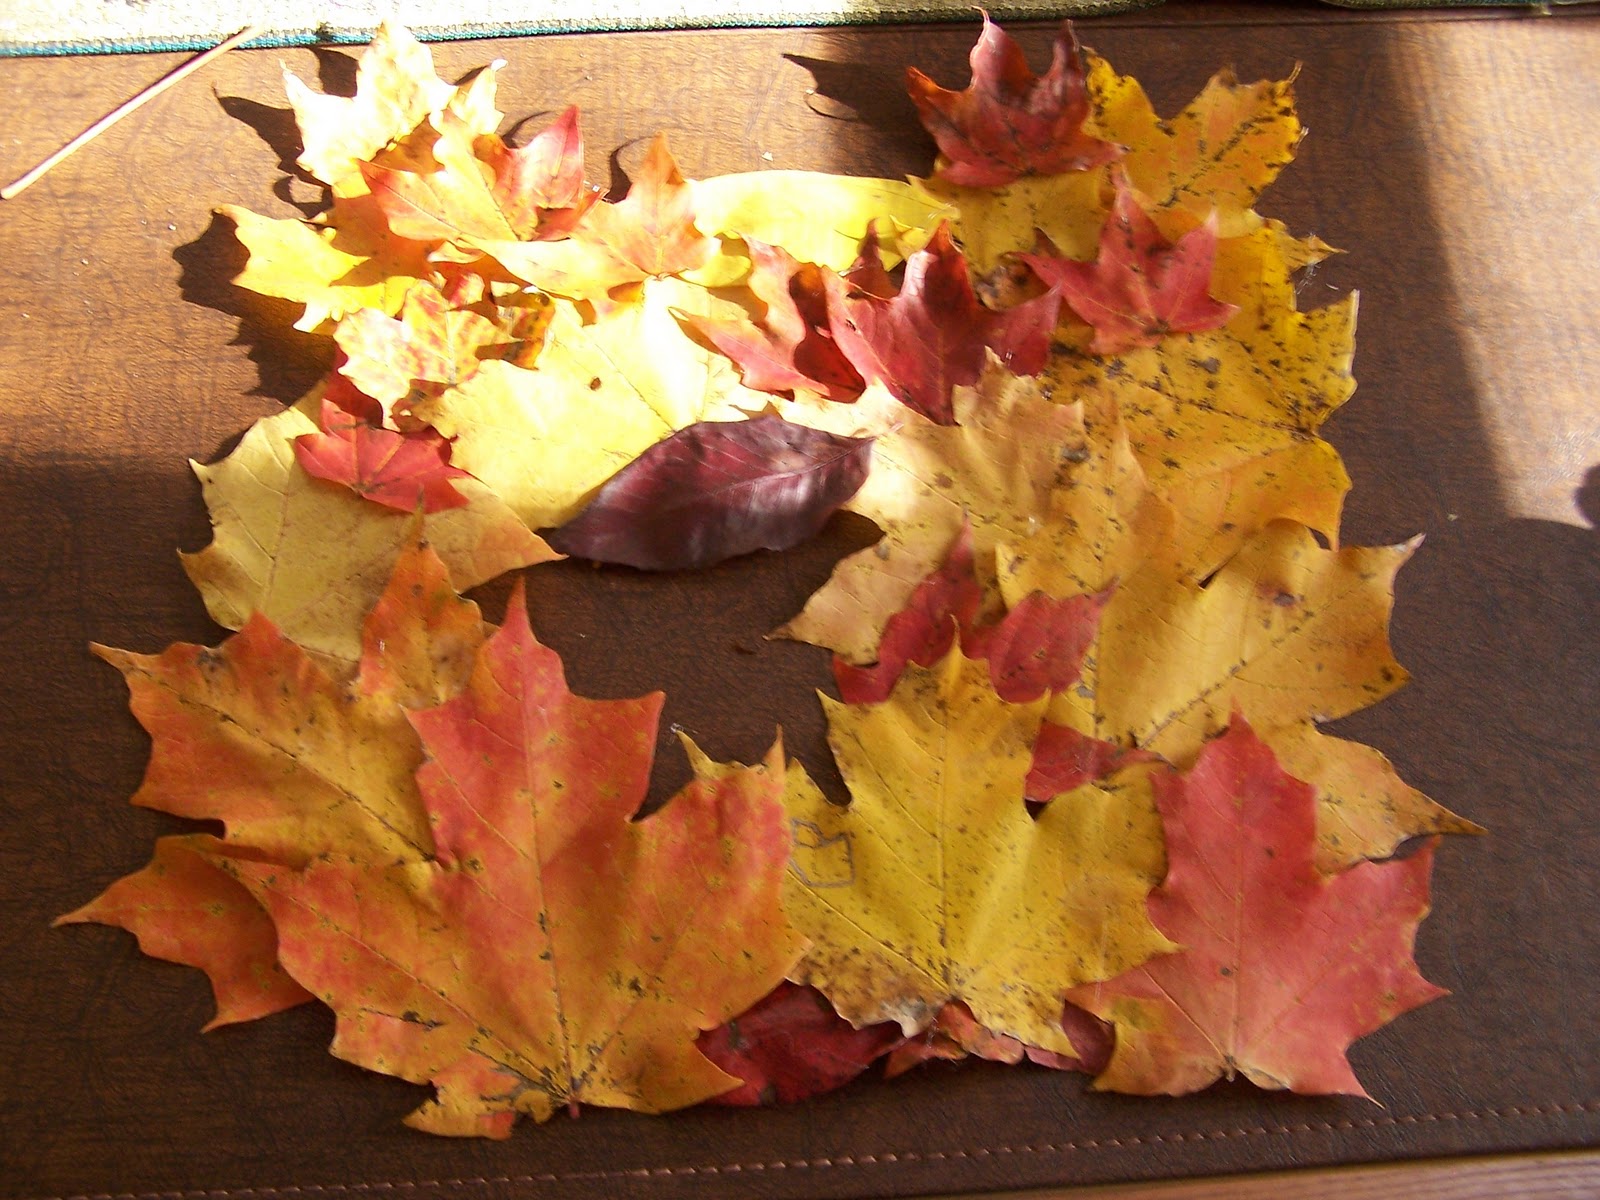
I spent some time this past weekend taking down our Halloween decorations. All three of them. The cute little sign on the kitchen door was replaced with the "Fall" wreath from the front door. The jack-o-lantern candy bucket was emptied, then it was time to figure out what to do with the skull decor. I removed the skulls (carefully as the leaves have gotten crispy!) and was left with this.

Cute but a big hole in the middle where you could see straight through to the bottom. So I spun it around. Problem solved very, very easily!

Tuesday, November 9, 2010
Getting Ready: Worms!
Before the giant tree came down in our backyard, I was really disappointed about the FAIL that our garden got. But now that the light blocker is gone the garden will stay and it is definitely going to need some compost to get it going in the spring. I've decided to try vermiculture, composting with worms, in bins, in the basement. Pretty much everyone I've told thinks it will smell, I'm pretty sure it won't. I took a class at UMass Amherst with John Gerber, and many people were composting in their dorm rooms or apartments with worms, with no smell. We shall see. I'm following some build-your-own instructions I found here. However, I couldn't find the right size bins that weren't clear. So I grabbed some for-plastic spray paint and went to work.


I've ordered the worms, based on the research I did, this seems like the best option. And I've been collecting food for them for about ten days so that there would be good, squishy food when they get here.

I'm using the glass jar to collect kitchen scraps, the plastic bin will live in the basement as a receptacle when the kitchen jar is full. The plastic bottle is a fruit fly trap, just in case and it will live in the basement with the worms!
Side note: the for-plastic spray paint was awesome, I'm thinking of customizing our decoration storage boxes with corresponding holiday colors. Someday.
Monday, November 8, 2010
What!!!
I just bumped this week's posts back a day. For this: I woke up to a sound, it was familiar and unwelcome. My first though was No which continued with nowaynowaynoway as I vaulted out of bed, over Kenny puppy and to the window to see:
 That's right, today the eighth of November it is snowing. The storm windows aren't on the house, I'm not sure where the shovels are, and I'm pretty sure that my snow brush for my car is somewhere in the garage.

Saturday, November 6, 2010
Repair cont.
I have no photos, I'm to frustrated for photos. I overslept Thursday then spent hours out sourcing materials and driving all over looking for less than a gallon of Linseed Oil. When it got down to attempting to cut the glass to the appropriate size, it is not as easy as one would hope. The first attempt was a giant FAIL, which eventually resulted in McGuiver~ing some tools and almost getting the second sheet cut correctly.
After FAIL #2 I gave up and binged on HGTV until Bruce got home, at which time we assessed the issues of the tools together and I in frustrated tears demanded that he make me a tool which would fit my needs. He laughed lovingly at my frustrated tears and we headed to Home Depot.
Currently he's cutting the tree in the backyard into little pieces and I'm cleaning up the house. Maybe I need a day off from glass cutting anyways.
Wednesday, November 3, 2010
Repair: Storm Window
Changing of the seasons means going back and fixing your mistakes. Like trying to use brute force to remove the storm window from our bedroom. Because our windows are original, they have glass storm windows that every spring need to be taken down to put up the screens. And because they are very old some of the glazing putty (that holds the glass in the frame) is dryed out and falling out. So when I slammed the bottom of the frame with my fist to dislodge it from the window, the glass twisted along the one side that was still secure in the frame and shattered.
In both panes.

This is the frame, old putty and glazing tacks removed, with some of the paint cleaned up. I'm following some instructions from Ace Hardware. Hint, if you take a look at these instructions, a hairdryer works well if you (are normal DIYer) don't have a heat gun.
Sunday, October 31, 2010
Happy Halloween!

From Mom & Dad's kitchen circa 1988 with Michael one of my best lil' buddies growing up!
Friday, October 29, 2010
Halloween Cupcakes
Last Sunday we had a few people for dinner and I whipped up some Halloween decorated cupcakes. I wanted them to look like these from Williams-Sonoma:

I made a half batch of chocolate cupcakes using one of Ina Garten's recipies, then a vanilla frosting and chocolate ganache from my Better Homes and Gardens cookbook using proportions for the amount I though I would need.
Half I frosted with vanilla and half I dipped in the chocolate. Then I used yellow and red food coloring to make the vanilla frosting orange and put it in a sandwich bag, the chocolate ganache was also put in a sandwich bag.
On the vanilla frosting I piped a swirl with the chocolate then used a tooth pick to gently pull through the lines to create a spiderweb. On the chocolate Iganache pipped a pumpkin, I whish I had made a little green or brown to make the stems a different color but I think they were cute!

If you don't like baking from scratch just use cake mix, and premade frosting, I'm even pretty sure that I saw premade ganache with the premade frosting.
Thursday, October 28, 2010
Halloween Decor
Everyone seems to be filling glass vases in a sort of topiary, parfiet type of way. So I made my own for zero dollars.

Two foam skulls (from mom last Halloween), skewer, vase, glass, leaves, glue.

I used the glass to hold up the first skull, I used the skewer in the top of the first skull to hold the second skull up.
It was trial and error with the leaves, at first I just dumped them in but they weren't falling the way I wanted them to. I glued them together creating the opening I needed to see the bottom skull and look pretty. I love the way it came out!
Wednesday, October 27, 2010
DIY: Pumpkin
If you noticed yesterday there was a pumpkin in the china cabinet. I made it following instructions I found here through A Diamond in the Stuff.

Tuesday, October 26, 2010
Festive for Fall
Now that most of the fall cleaning is done I pulled the few decorations we had, added what my mom sent and made a few! Here's the dinning room all done:


I'll have the specifics for the projects up soon!
The centerpiece is composed of three pillar candles, two of which I wrapped with ribbon from the dollar store and a few gourds I picked up on the runner I grabbed out of season last year at the Christmas Tree Shop for two dollars. Here's a better view:

The centerpiece is composed of three pillar candles, two of which I wrapped with ribbon from the dollar store and a few gourds I picked up on the runner I grabbed out of season last year at the Christmas Tree Shop for two dollars. Here's a better view:

Monday, October 25, 2010
Cont: The Tree Adventure

Friday, October 22, 2010
Being a Squirrel: The last installment.
Somehow, I forgot to take any photos of the sauce making, maybe, it was being covered (and covering the kitchen) by tomatoes.
I started with twenty pounds of Roma tomatoes. I purchased them for twelve dollars at the farm stand down the street.
I peeled them, by scoring the skin, placing them in a pot of boiling water for a minute then placing them in an ice water bath.
Once peeled I seeded and cored them. I saved the peels, seeds, etc. in a strainer over a bowl.
After the first few batches I roughly chopped two onions and four cloves of garlic and let them soften in my biggest pot with some olive oil, salt and pepper. Then back to the tomatoes. Once they had softened I added the tomatoes.
In another pot I put the peels, etc. once the strainer was full to cook the remaining flesh from the peels and cores. Occasionally smushing them with a wooden spoon.
Once all the tomatoes had been processed I added dried spices to the mixture: basil, parsley, oregano and marjoram. Then I let everything simmer for a very long time. After a while I took the pot with the peels and cores, and pressed out the sauce through a strainer. I did this in batches so that I could discard the remaining skin and seeds and get the most out of them. I added this to the big pot with the tomatoes.
After everything had simmered for hours I used a hand blender to break down the tomato flesh then let it simmer until it reached the consistency I wanted, adjusting the spices as I went. I canned four quarts but I probably made five and used one before they were canned.
Thursday, October 21, 2010
First Fire
Tuesday night we had our first fire in the fireplace of the winter. We ate chilli and watched the last two episodes of Rome. Which I highly recommend.

Wednesday, October 20, 2010
Home made soup? Yes please!
I've had the sniffles for about a week and a half. I used the left over turkey stock to make some turkey noodle soup. Yum. Definetly help my sniffles and if you don't have turkey stock, use chicken!

Don't you feel better already?
Turkey Noodle Soup
Ingredients
1 Turkey thigh
3 Sprigs fresh thyme
5 Sage leaves
1/2 medium onion, diced
2 carrots, chopped
2 celery stalks, chopped
2 cups turkey stock
spash white wine
1 small hand full spaghetti
salt, pepper and spices to taste
Directions
- Poach the turkey thigh in the stock with fresh herbs.
- While turkey is cooking, prepare and saute the onions carrots and celery in the bottom of your soup pot with a little oil and salt and pepper to taste.
- Once turkey is done, remove the meat and cut into bite sized pieces.
- Deglaze veggies with white wine then add turkey meat to soup pot.
- Remove fresh herbs from poaching pan, then add stock to soup pot and bring to a boil.
- Once soup is boiling break spaghetti into thirds and add to soup, once pasta is cooked it's ready to go!
Alternatives
If you don't like dark meat, use breast meat I used it because it was on sale.
If you prefer to be alcohol free, deglaze with a ladel-full of stock.
The amount of stock is a guess, it will also have more concentrated flavor due to the poaching. I'm pretty sure I added water before the pasta and there was no loss of flavor. If you like lots of broth then use more, if not use less.
Use whatever pasta is open in your pantry, or whatever your favorite is.
Spice things up! Some suggestions: red pepper flakes, cumin, curry . . . the possibilites are endless!
Tuesday, October 19, 2010
Adventure: Marathon
The ING Hartford Marathon was 2 weekends ago (10/9) we were up at 5:30, the culmination of months of training, heading to Hartford so the boys could run.

This was just before I collected sweatshirts and wished them luck.

The race started at the capital, at this point I was fighting off some serious anxiety, trying very hard not to cry.

Runners off, still trying not to cry (alone, in public). I saw the boys at miles six and eight, then wondered around Hartford, watched the half marathoners finish and collected friends and family that came to watch the finish. I didn't take any photos I was to preoccupied with finding the boys among the runners.

Bruce finished in four hours, two minutes, I didn't manage to get a photo of my own he was going to fast! Tim four, twenty five; and Ron four, fifty-eight. I'm so proud of them all!
Monday, October 18, 2010
The Tree Adventure Continues
So we are slowly making our way through the massive tree down in our back yard. And by we I mean Bruce and his brother Tim. Bruce took this photo Wednesday, it's a good scale for how big the tree is.

That's Tim, Me and Kenny.

This is the progress that was made over the weekend, it's getting there. Hopefully after this coming weekend we'll have a yard again!
Sunday, October 17, 2010
How to be a Squirrel
The first thing I made was the turkey stock, honestly it was because two sets of turkey bones took up a third of our fridge. It's made the same way as chicken stock, check that out here.
The second thing I made were the baked beans, with a bone from a Honey Baked Ham. My biggest conundrum was what to cook them in, I needed something that was large enough in diameter to fit the bone but also that I could put in the oven. My 12 inch skillet fit the bill, but the handle is plastic and the cover is glass.
The second thing I made were the baked beans, with a bone from a Honey Baked Ham. My biggest conundrum was what to cook them in, I needed something that was large enough in diameter to fit the bone but also that I could put in the oven. My 12 inch skillet fit the bill, but the handle is plastic and the cover is glass.

I McGuyver-ed it.

There is one screw that holds the handle onto the the pot, so I removed it and I used to much water so I never needed a cover, but it I had tin foil would have worked.

The recipe is below, I made a double batch, which made 5 pints with some leftovers. It probably would have been 6 but I burnt the bottom while I was reheating them to hot pack them. Also if you don't have a ham bone, salt pork is an acceptable substitute.
1 (16 ounce) packages dried navy beans
2 teaspoons salt
3/8 cup (6 tbsp) dark molasses
1/4 cup packed dark brown sugar
2 tablespoons real maple syrup
1/2 tablespoon dry mustard
1/2 teaspoon pepper
small onion
2-3 whole cloves
1 meaty ham bone
Directions
1. Prepare beans: Rinse well and discard any stones or shriveled beans.
2. Soak beans in water in a 5 quart Dutch oven, using the overnight or quick soak method.
Overnight Method: Cover each cup of dried beans with 3 cups of water; let stand for a minimum of 12 hours.
Quick Soak Method: Add beans to boiling water, allowing 3 cups of water for each cup of beans, bring back to the boil and boil for 2 minutes; remove from heat, cover and leave for an hour, then cook in same water.
3. Bring mixture to a boil, add salt, reduce heat, cover and simmer for an hour.
4. Stir in molasses, brown sugar, maple syrup, mustard and pepper.
5. Stud the onion with the cloves; tuck onion & ham bone into the beans.
6. Cover and bake in a 250F oven for about 7 hours; check & stir about once an hour.
7. Add more water to keep beans moist but not too wet OR remove lid to thicken mixture through evaporation; it all depends on your preference for thick or runny!
8. Discard cloves, chop onion and return to mixture.
9. Remove meat from ham bone and return to mixture.
Friday, October 15, 2010
Side Bar Update
Take a look to the right.
I've renamed and updated the "Projects" list.
Landscaping - stand still - #1. gaint tree across the backyard #2 we need a new roof, the installment of which would kill anything near the house.
Waterproofing the basement - I need more Drylok and a gas mask.
Master Bedroom - I have a plan. We need a few pieces of furniture and paint.
Remove Wallpaper - Steamy, messy, tedious will involve moving all the living room furniture and the TV
Breezeway - needs fabrics and some organization, I'm also thinking about doing something to the floor ala YHL
Thesis - needs to be bound
Major Issue = Lack of funds hopefully to be fixed in the near future.
Thursday, October 14, 2010
I'm like a squirrel
Storing things away for winter! Even though the garden was pretty much a bust I spent all last week canning after raiding mom and dad's freezer (or hearing take that stuff or I'm throwing it away!) and buying 20 pounds of plum tomatoes from the farm stand down the road for $12.

14 Quarts of Turkey Stock
5 Pints of Baked Beans
4 Quarts of Marinara Sauce
Look for details, recipies and weekend adventures soon!
Monday, October 4, 2010
Missing Adventures
Things seem to happen when I go away. Like a giant tree branch falling and narrowly missing our house and Bruce sending this photo to my phone with the caption Well that was close.

This, of course, meant that the rest of the tree (to the left) needed to come down as well. So when Kenny and I came home Friday, this was the first thing we saw.

Once we got outside to the right was the trunk.

And to the left was the bulk of the top of the tree.

The good news, this tree was the major culprit blocking the sun from the garden and even better when Bruce fell the rest of the tree it missed my tomato plants! The bad news, pretty much our entire backyard is a tree and it is supposed to rain all week.
Friday, September 24, 2010
Phase 2
Sorry everyone, I didn't take any pictures. I have moved onto Phase 2 of the basement waterproofing project. Even though Phase 1 isn't really complete as the thunderstorm Wednesday night showed me by leaving puddles in the stairwell.
Yesterday I sealed the windows using Drylok's Fast Plug, let me tell you that stuff sets FAST. I mixed one full batch and only got through half of it before the other half set up, so I ended up mixing half batches.
Yesterday I sealed the windows using Drylok's Fast Plug, let me tell you that stuff sets FAST. I mixed one full batch and only got through half of it before the other half set up, so I ended up mixing half batches.
Wednesday, September 22, 2010
The Unexpected Project
I realized I never expanded on the Unexpected Project/Adventure that I had mentioned back in August. We replaced the basement hatchway doors which included repairing the concrete of the top step. While Bruce was removing the old doors and frame I scraped off the peeling paint and remember this post from YHL. So we picked up some Drylok while we were at Home Depot getting supplies. I finally got the stairwell painted yesterday, I had been dreading it because there was a lot of prep to do. I'm sorry I don't have a before to show you but it was 2 shades of old masonry paint that was peeling and chipping concrete.


Nothing really glamorous but definetly a big improvement, this is not the major water seepage area but my plan is to do the entire basement, big basement, big plan. The next step in the plan is to seal the windows which (while cleaning) I found to be not only filthy but also one of the water problem areas.
Total cost of the doors project was just over $400, including doors, concrete and paint. We choose to use the latex base Drylok because I'm pretty sure that the existing paint is latex.
Tuesday, September 21, 2010
Marsha, Marsha, Marsha
I was playing with Kenny last night and he threw his shoulder into my face. Specifically my nose, so hard that I went from kneeling up to flat on my back and upon realizing what had happened, started to cry like a startled three year old. Kenny proceeded to bark at me to keep playing and Bruce got down on the floor with me and told me "You're OK you're just in pain" my thought was "WHAT!?!?! I'm going to look like Marsha Brady when she gets hit in the face with the football."
 Today it hurts like hell, but I don't quite look like Marsha, Marsha, Marsha . . .

Subscribe to:
Posts (Atom)